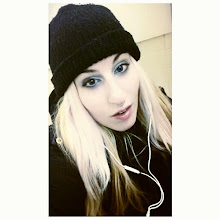
(I used this technique to draw an image of Davey Havok.)
what is graphic enlargement?
it is an art technique where you take a small image and multiply it's dimensions by how many times you'd like to increase it's size to draw it on a larger scale. not only does this enable you to draw small images on a larger scale, it also enables you to draw the right proportions.
how do I do this technique?
first, what you need is: a ruler, a computer with a printer, a sketchbook or paper, a pencil, and a calculator.
second, if you see a picture online and say "wow! I'd love to draw this image!"
all you need to do is print out that image (but never print "fit to page" for graphic enlargement). it's best to find a small thumbnail image to print out if you are using this technique. for example, this image here would turn out to be fairly small when you print it, perfect for this technique:

third, after you print out an image you like you measure it's dimensions with a ruler. for example, let's just say the image from above turned out to be 2 by 3".
fourth, now that you have your smaller image's dimensions you can multiply those dimensions by any number you'd like to increase the size by so you can draw it on a larger piece of paper. for example, you have a 9 by 12" sketchbook and want to draw that smaller image in it, or maybe you have a 12 by 12" piece of paper. let's say you'd like to make your small image 4 times larger so it could fit your sketchbook. what you do is multiply the small image's dimensions (2 by 3") by 4 so you know what size paper you need to draw the image on. so for example, the dimensions of your larger scale drawing will turn out to be 8 by 12".
fifth, now that you have the dimensions needed for your actual drawing you must mark these measurements down on the piece of paper you are using with your ruler. so for example, that 9 by 12" piece of paper from your sketchbook now must be cut to equal 8 by 12".
sixth, now using your ruler you must draw lines directly meeting in the middle of the small image, and the paper you are drawing on. first, what you do is divide the small image's dimensions in half to make these lines. so the small image, which is 2 by 3" the lines you would draw would be at 1" and 1.5". for the paper you are drawing your image on, which is in this case, 8 by 12" you also divide these numbers in half. so on that paper you will draw lines at 4" and 6".
what you want is for it to look like this (and I am very much aware of how off the small image's lines are, I did not use a ruler for it, this is just for example and I happened to have 8 by 12" already marked on one of my pages):

a general rule of thumb is what ever dimensions you have, just divide them in half to make the lines exactly in the middle of the images.
seventh, now after you have drawn your lines down the middle of both images with your ruler, what you do is use the small image you have as a guide for drawing on your larger piece of paper. what you do is number the boxes on the small image and also put these same numbers in the boxes of the larger piece of paper you are drawing on. now you simply match each box up and draw what you see in each box according to the numbers. like this:

the lines you drew for this technique can be erased after you finish your piece. it's best to draw the lines lightly.
personally I like printing images out and cutting them down to equal exactly 2 by 3". what I then do is always multiply those dimensions by 4 so my actual drawing will be 8 by 12".

wow!, you're good!
ReplyDeleteI don't use techniques when I'm drowing
I just do it
you're awesome